Difference between revisions of "MASC/uCLinux On LEON3"
(→Building the LEON3) |
|||
| Line 117: | Line 117: | ||
$ cd /opt/Xilinx/11.1 | $ cd /opt/Xilinx/11.1 | ||
$ ./settings32.sh | $ ./settings32.sh | ||
| + | $ export PATH=$PATH:/opt/Xilinx/11.1/ISE/bin/lin | ||
== Program ML505 with μCLinux and LEON3 == | == Program ML505 with μCLinux and LEON3 == | ||
Revision as of 20:28, 21 December 2009
Contents
Introduction
MicroController Linux (μCLinux) is a Linux operating system for embedded hardware systems without a memory management unit (MMU).
The LEON3 is a 32-bit VHDL processor core based on the SPARCV8 RISC instruction set architecture.
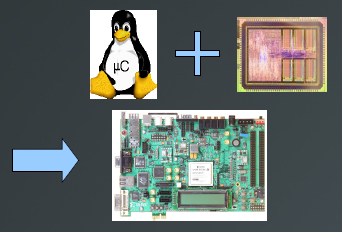
This project will involve synthesis and placement of a LEON3 processor onto a commercial off the shelf (COTS) field programmable gate array (FPGA), μCLinux will then be loaded to the FPGA.
Hardware
- Xilinx Vertex 5, ML-505 board
- Xilinx Platform Cable USB
- Host Computer. x86-64 machine (AMD Phenom x4 9950 Black (AMD64))
People
- Professor Jose Renau: Leader of the MASC group at UCSC, instructor for CMPE-202, Computer Architecture.
- Samuel Toepke: PhD Student, primary investigator, student of Professor Renau.
- Tom Golubev: Member of MASC group, MS student. Source of Xilinx tools, Xilinx ML505 board and Xilinx Platform Cable USB.
- Rigo Dicochea: Member of MASC group, PhD student, general FPGA resource.
- Javier Castillo: Member of MASC group, embedded Linux resource.
System
- Ubuntu 8.10/9.10 running Sun VirtualBox Version 2.2.2 r46594/Version 3.1.2 r56127.
- Virtual Machine running CentOS 5.3 i386, http://www.centos.org
- Download:
- CentOS-5.3-i386-bin-1of6.iso
- CentOS-5.3-i386-bin-2of6.iso
- CentOS-5.3-i386-bin-3of6.iso
- CentOS-5.3-i386-bin-4of6.iso
- Procedure:
- Obtain a desktop computer. Any desktop machine with a USB port, serial port, and internet connection should suffice. Install the host Operating System of Ubuntu 8.10, as well as the specified VirtualBox.
- Download the CentOS distribution, specific .iso files listed above.
- (VirtualBox is used here, however, CentOS could of course be used as the machine's primary operating system). In VirtualBox, create a new virtual machine. Specific options used are described in CentOS_5.3_i386.xml.
- With the new virtual machine, mount and boot to CentOS-5.3-i386-bin-1of6.iso.
- When installing CentOS, install the following extras: "Development Libraries","Development Tools","Java Development","Legacy Software Development".
- Login-name: 'centos' sans single quotes.
- Once CentOS is installed: a. Applications->System Tools->Software Updater
- We know have a fresh, updated operating system to begin the project.
Building uCLinux
Cross Compiler
The cross compiler is necessary to compile μCLinux using LEON3 as the target architecture.
In the CentOS virtual machine, open a terminal.
$ cd
$ pwd
/home/centos
$ mkdir uCLinux
$ cd uCLinux/
$ mkdir crosscompiler
$ cd crosscompiler/
$ wget ftp://gaisler.com/gaisler.com/linux/linux-2.0/toolchains/sparc-linux-3.2.2/sparc-linux-3.2.2-1.0.1.tar.bz2
$ tar xjf sparc-linux-3.2.2-1.0.1.tar.bz2
$ su
Password:
$root cp -R ./sparc-linux /opt
$root exit
exit
$ export PATH=$PATH:/opt/sparc-linux/bin
uCLinux Source
We're going to use an instance of uCLinux that is safely ensconced within SnapGear Linux provided by Gaisler. The mainline distribution of uCLinux is rife with 'paper cuts'.
$ cd
$ cd uCLinux
$ mkdir uCLinux_source
$ cd uCLinux_source
$ wget ftp://gaisler.com/gaisler.com/linux/linux-2.0/snapgear/snapgear-2.0-p36.tar.bz2
$ tar xjf snapgear-2.0-p36.tar.bz2
$ cd snapgear-2.0-p36
$ make xconfig
         Kernel/Library/Defaults Selection, Libc Version: uClibc, Customize Vendor/User Settings: Y,
         'Save and Exit'.
         Set Kernel Command Line: n
         boa 0.94.14rc21: n
         hdparm: n
         SnapGear Embedded Linux Application Configuration -> Network Applications, telnetd: n,
         'Save and Exit'.
$ make dep
$ make
Built images will be found at: /home/centos/uCLinux/uCLinux_source/snapgear-2.0-p36/images/
TSIM
Validate the built image by using a LEON3 emulator from Gaisler.
$ cd
$ cd uCLinux
$ mkdir TSIM
$ cd TSIM
$ wget ftp://ftp.gaisler.com/gaisler.com/tsim/tsim-eval-2.0.14.tar.gz
$ tar xfz tsim-eval-2.0.14.tar.gz
$ export PATH=$PATH:/home/centos/uCLinux/TSIM/tsim-eval/tsim/linux/
$ cd /home/centos/uCLinux/uCLinux_source/snapgear-2.0-p36/images/
$ tsim-leon3
$ tsim> load image-2.0.x.tsim
$ tsim> run
Building the LEON3
To build the LEON3, somehow get hold of Xilinx ISE 11.1. I created an account at http://www.xilinx.com/ to download 'SW, ISE Design Suite: Full DVD Single File Download Image'. The file required is 'Xilinx_11.1_ISE_DS_SFD.tar'.
$ cd
$ cd uCLinux
$ mkdir Xilinx_ISE_11
$ cd Xilinx_ISE_11
$ #Place the downloaded Xilinx_11.1_ISE_DS_SFD.tar into this directory.#
$ tar xf Xilinx_11.1_ISE_DS_SFD.tar
$ cd Xilinx_11.1_ISE_DS_SFD
$ su
Password:
$root echo 0 >/selinux/enforce #to turn off secure linux
$root ./xsetup #Keep defaults, except: unselect 'Acquire or Manage a License Key', unselect 'Launch XilinxUpdate'.
$root chmod -R 755 /opt/Xilinx/11.1
$root exit
exit
$ cd /opt/Xilinx/11.1
$ ./settings32.sh
$ export PATH=$PATH:/opt/Xilinx/11.1/ISE/bin/lin
