Creating a new project
1. Double click the Project Navigator icon ![]() on the Desktop.
on the Desktop.
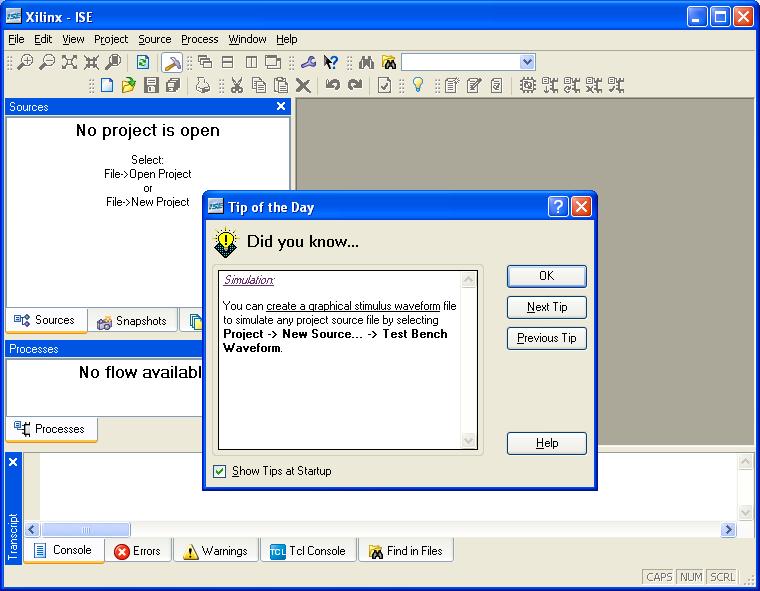
2. This will bring up the Project Navigator as shown below. You'll want toclose the Tip of the Day, but first uncheck the box at the lower left(unless you want tips every time you start the Project Navigator).
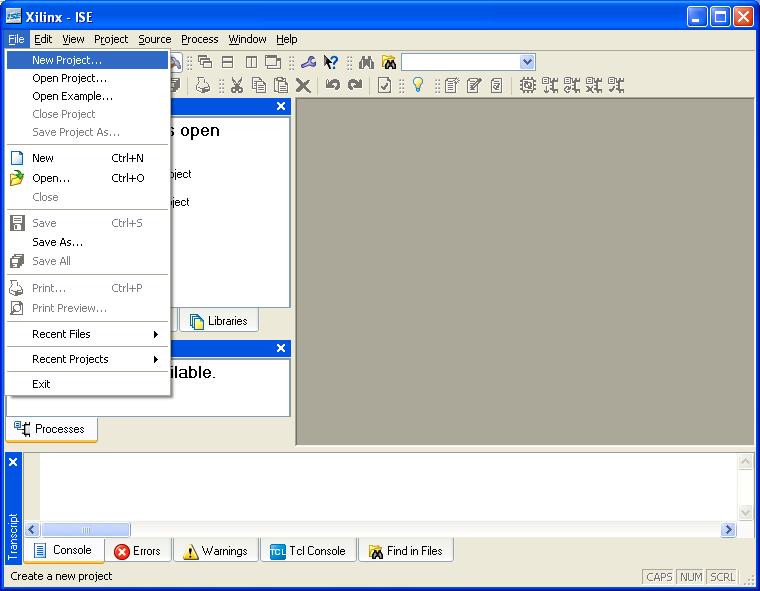
3. Pull down the File menu and click on New Project as shown below.
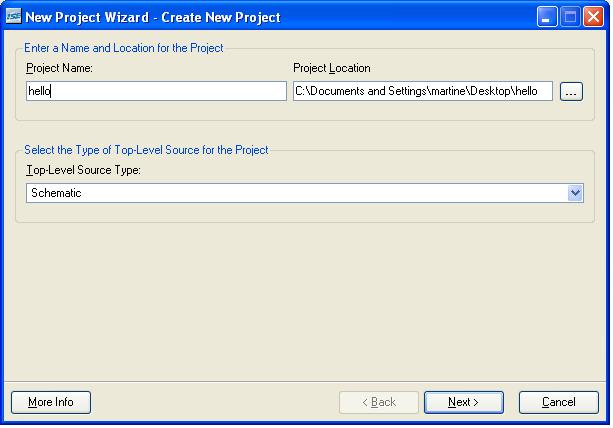
4. The new project wizard (shown below) will prompt you for the informationneeded to setup a new project.
a. Enter the name for your project (hello). b. Use the Desktop as the location for your project: C:\Documents and Settings\martine\Desktop. c. Select Schematic as the Top-Level Source Type. d. Click Next.
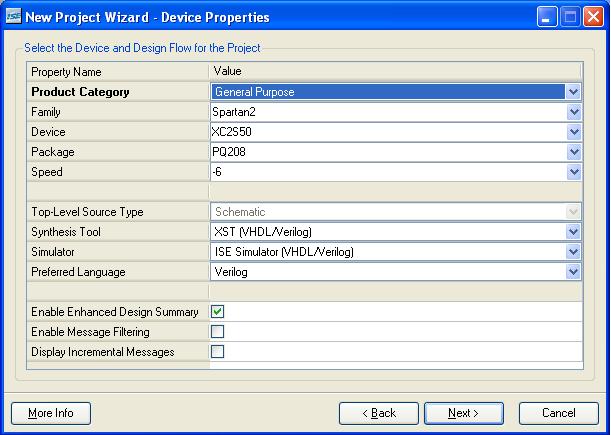
5. Check that all of the values are the same as below and then click Next three more times. (You don't have any sources to add to your design yet, so you skipped that part. In future labs you may want to reuse your schematics or other files from your previous labs.)
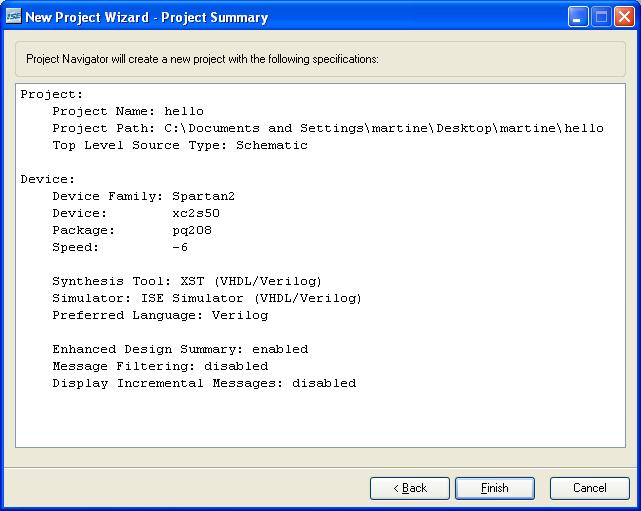
6. Check that all of the values displayed are correct (same as shown below). If so click Finish, otherwise go back and fix them.
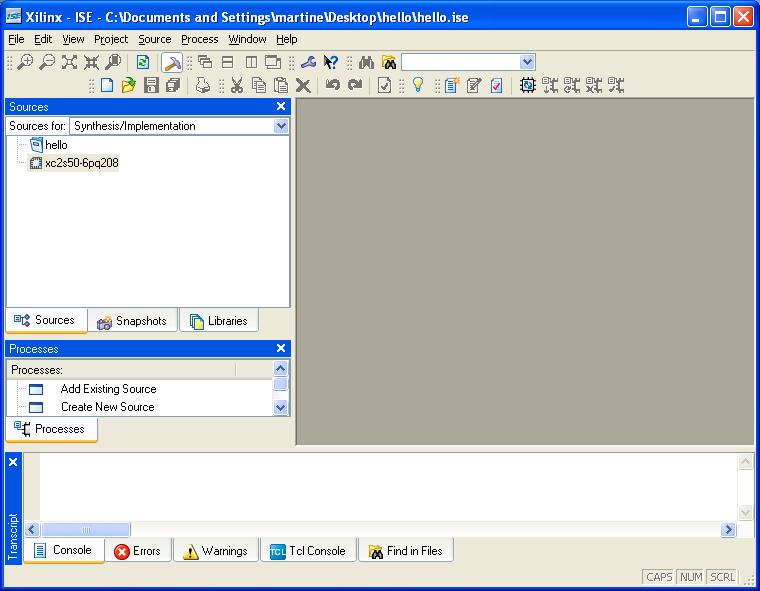
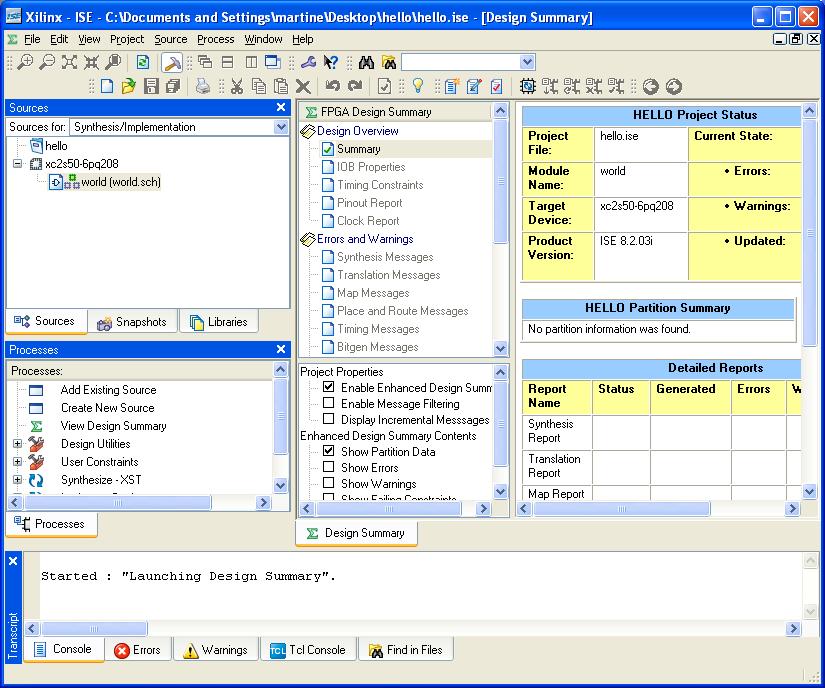
7. You are now in the Project Navigator (below).
Take some time to familiarize yourself with the Project Navigator; you'll be using it extensively. The upper left pane displays the sources that make up your project (none yet). Currently it shows that your project is "hello" and the FPGA device is"xc2s50-6pq208." The lower left pane displays the processes that can be applied to the source currently selected in the upper left pane. Right now you can only add source files, new or existing. The main window pane will be used to edit and view sources.
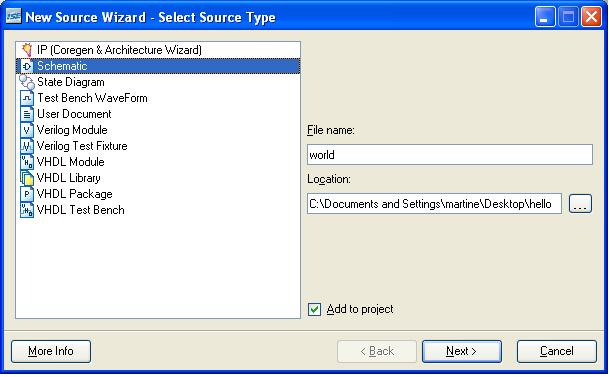
8. From Project menu select New Source... Then in the New Source Wizard window (shown below), select Schematic and enter a name for your top level schematic (in this case "world"). The location should already be filled in with the project directory,C:\Documents and Settings\martine\Desktop\hello. Click Next.
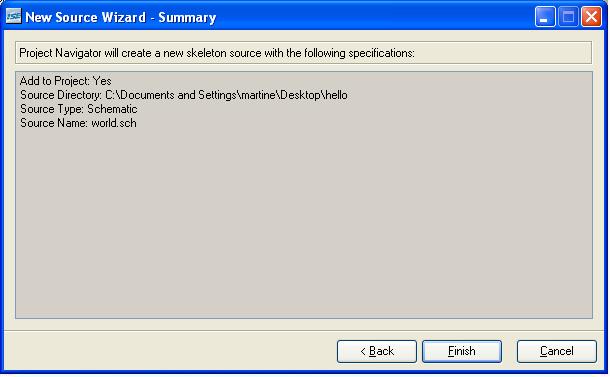
9. Check that eveything is ok (as shown below) and then click Finish.
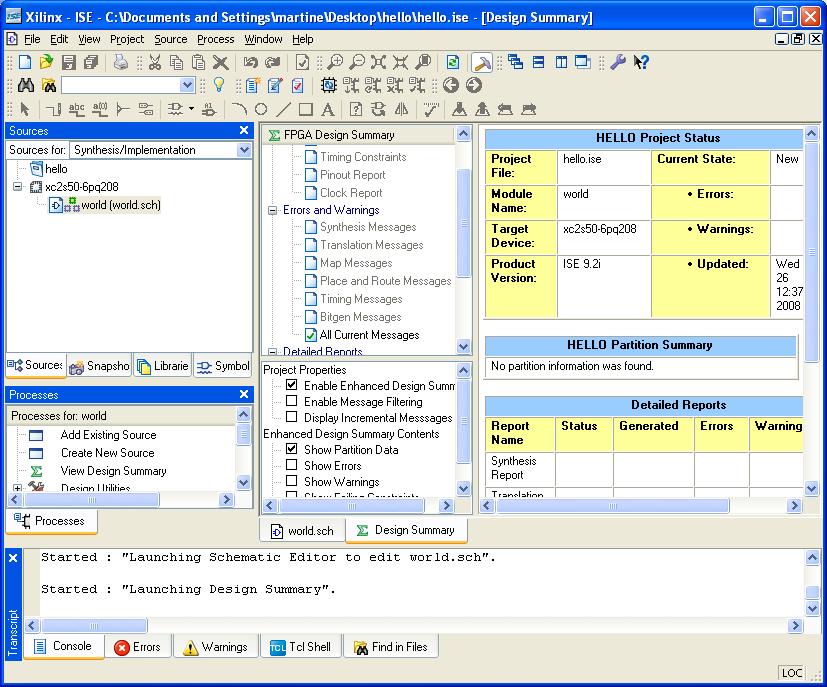
10. The schematic editor was started and the design summary now appears in the main pane of the Project Navigator as shown below.
Click on the tab world.sch in the main pane. Your empty schematic will appear in the main pane as shwon below.
This is the tool you will use to draw schematics. You can pull this pane out of the Project Navigator using the float icon . You will want to do this when you are entering a schematic so that you can enlarge the window. Try this and then close the schematic editor window.
11. The top left pane of the Project Navigator now shows a source for your "hello" project.
Select your schematic "world.sch". The processes you can apply to it will appear in the lower left pane. Congratulations you have successfully created a project. You can close the project now. But in the future, you will want to archive your project so that you can back it up somewhere off the BE104 PCs.
Do not store files on the PCs. Files placed in the desktop should reappear when you login again, even on a different PC, but don't depend on it.
